Gauge Style Idea
Overview
While configuring your elements' visual appearance you may have encountered a problem of adjusting your elements' options, especially when these options are common for a whole group of elements. For this case we have a styles node, in which you can describe the style of your color ranges, tooltips, labels, pointers, i.e. fully configure the view of your gauge.

Style Idea and Demonstration
Style is a named set of configuration nodes for some element, each style holds all unique settings for the element, typically style consists of a main
part and so-called states.
Each style should have a unique name among the styles of the same type, you can create <bar_pointer_style name="Style1"/> and <marker_pointer_style name="Style1"/> at the same time.
Main part holds all default settings for the element, and states define how element looks like when it is hovered, pushed selected and so on. The number of states supported may differ from style to style.
Most convenient way of using style is to define the settings that wouldn't change (like a marker shape, for example, or line thickness) and create a named style in <styles/> node.
Later, when you create an element you specify the style attribute and set its value to style name.
Let's go through the creation of a simple circular gauge with the several pointers
of a Needle type to understand how everything works.
Create a Gauge
At first we just create a circular gauge and some pointers without configuring them. We create a simple 360 degrees circular gauge, set a scale bar for it and enable labels. We also disable both minor and major tickmarks. All these settings we describe in axis node:
01 |
<axis start_angle="0" radius="40" sweep_angle="360"> |
02 |
<scale minimum="0" maximum="360" major_interval="30" /> |
03 |
<labels enabled="true" align="Inside" padding="0"> |
04 |
<format><![CDATA[{%Value}{numDecimals:0}]]></format> |
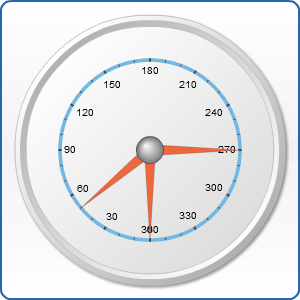
Now we need to create some pointers that will have different default values but no other pre-set options. We do this by creating a pointers node. Now we need pointers themselves. Let's say we need to have 3 pointers of needle type. So, we need 3 corresponding nodes. With only two attributes: type and value:
02 |
<pointer type="needle" value="0" /> |
03 |
<pointer type="needle" value="50" /> |
04 |
<pointer type="needle" value="270" /> |
And that's the result of our work:
Live Sample: Style first gauge 1
Note that we although we haven't set color and size for our pointers AnyChart has calculated it automatically.
Configure an Element
Now let's configure one of the elements: let it be the first needle pointer. We will change its color, length and color on hovering. To configure a style of a certain pointer you need to create a subnode needle_pointer_style inside pointer node. There we change radius attribute to 120:
02 |
<pointer type="needle" value="0"> |
03 |
<needle_pointer_style radius="120" /> |
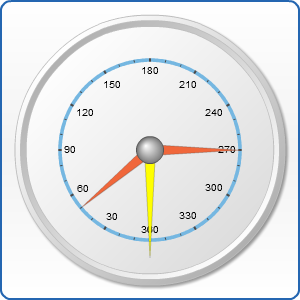
And now let's get to states. We create the corresponding subnode in needle_pointer_style node and define that our pointer should have yellow color in normal mode and green color when we hover on it. So the XML for pointers now is as follows:
02 |
<pointer type="needle" value="0"> |
03 |
<needle_pointer_style radius="120"> |
06 |
<fill enabled="true" type="solid" color="yellow" /> |
09 |
<fill enabled="true" type="solid" color="green" /> |
12 |
</needle_pointer_style> |
14 |
<pointer type="needle" value="50" /> |
15 |
<pointer type="needle" value="270" /> |
We may see the results of our actions at once:
Live Sample: Style first gauge 2
Define reusable settings and put them in Style
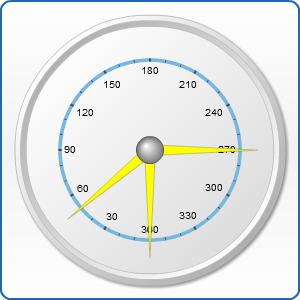
But what's if we want to set some similar settings to a whole group of elements? Should we define attributes for each of them? Of course no! For these purpose we may use styles, and then apply a configured style to any element you want. Let's imagine that we want to apply settings of our first needle pointer from the previous example to another pointers. So, we create a styles node and then place needle_pointer_style and its attributes there:
02 |
<needle_pointer_style name="Style 1" radius="120"> |
05 |
<fill enabled="true" type="solid" color="yellow" /> |
08 |
<fill enabled="true" type="solid" color="green" /> |
11 |
</needle_pointer_style> |
Apply a Style
Now when we have created our style let's apply it to all pointers. In every pointer node we create style attribute and enter our style's name there:
02 |
<pointer style="Style 1" type="needle" value="0" /> |
03 |
<pointer style="Style 1" type="needle" value="50" /> |
04 |
<pointer style="Style 1" type="needle" value="270" /> |
As we have applied style to all pointers we have no need to describe the behavior of our first needle pointer inside pointer node. Here is the result:
Live Sample: Style first gauge 3
Override a Style
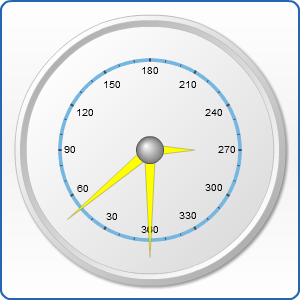
It is good when we have lots of object of the same properties, but sometimes we need to make some changes to a certain one. Let's imagine we need to make the third pointer shorter. So we create needle_pointer_style in our pointer node and set radius attribute to 50. But we already have defined radius in our styles node. What happens then? The value of 50 replaces the previous one. That is called "Style Overriding".
Live Sample: Style first gauge 4
Styles Inheritance
Whenever you create a style you may want to create it basing on another style - to do this just specify parent attribute and set its value to the name of the style you want to inherit. Sample XML:
02 |
<bar_pointer_style name="MainStyle"> |
03 |
<fill type="Solid" color="Red" /> |
05 |
<bar_pointer_style parent="MainStyle" name="ChildStyle" /> |
If you use XML above - all pointers with style="ChildStyle" will have Red fill as well as all styles with style="MainStyle".
Overriding AnyChart Defaults
Each element in AnyChart has internal default style named "AnyChart_Default". When you create an element - it is created according to this style settings. When you create a style it has parent="AnyChart_Default" and it inherits all default settings.
You can override this default and create your own preset - just create a style with a same name (for example: <bar_pointer_style name="AnyChart_Default"/>) - it will be empty and you can (and have to) create own preset from the scratch. Please use this option only if you clearly understand styles and need to override presets, because you may need to define a lot of attributed and nodes to achieve good result.
Common styles
There are 3 styles that can be used both in circular and linear gauges:
Linear pointers styles
For Linear Gauge pointers we have 5 types of pointers and each has own style:
Circular pointers styles
For Circular Gauge pointers we have 5 types of pointers and each has own style: