Range Selector General Settings
Overview
This tutorial describes general settings of Range Selector Panel such as positioning, paddings, layout and disabling panel.

Enable/Disable
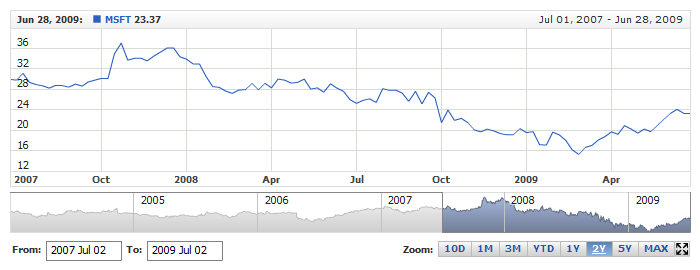
By default Range Selector Panel is disabled. To enable it use these settings:
01 |
<?xml version="1.0" encoding="UTF-8"?> |
02 |
<stock xmlns="http://anychart.com/products/stock/schemas/1.9.0/schema.xsd"> |
Sample Chart with Range Selector Panel:
Live Sample: Range Selector Enable and Disable
Positioning
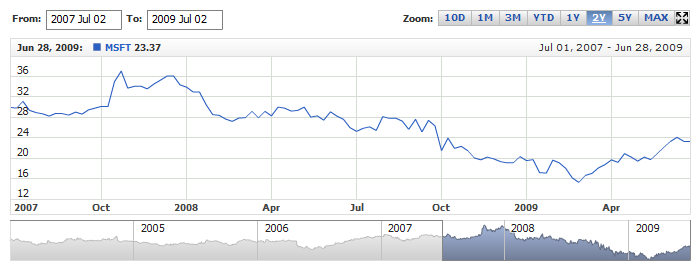
Panel can be placed either above (Top position) all charts or under (Bottom) all charts and scroller. This can be set using position attribute, which can set "Top" or "Bottom".
Sample XML:
01 |
<?xml version="1.0" encoding="UTF-8"?> |
02 |
<stock xmlns="http://anychart.com/products/stock/schemas/1.9.0/schema.xsd"> |
Sample chart with panel placed above the charts:
Live Sample: Range Selector - Positioning Settings
Padding
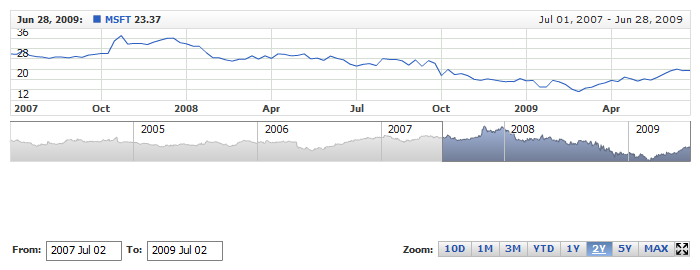
You can define the padding between the charts and the panel using padding attribute. The padding is specified in pixels.
Sample XML:
01 |
<?xml version="1.0" encoding="UTF-8"?> |
02 |
<stock xmlns="http://anychart.com/products/stock/schemas/1.9.0/schema.xsd"> |
Live sample of the chart with paddings set to 80px:
Live Sample: Range Selector - Padding Settings
Alignment and ordering of the Elements
Range Selector consists of Range Picker and Presets sub panels. Each of them can be aligned and you can swap them on the panel.
Sample XML of alignment and ordering of elements:
01 |
<?xml version="1.0" encoding="UTF-8"?> |
02 |
<stock xmlns="http://anychart.com/products/stock/schemas/1.9.0/schema.xsd"> |
As you can see align attribute is used to set alignment, and ordering_index attribute to define the order of elements on the panel (left to right). Also, there is an items_spacing attribute, which defines the space (in pixels) between Range Picker and Presets (in case they have the same horizontal alignment).
Live Sample with such settings:
Live Sample: Range Selector - Items Ordering